Welcome to my Blog!!!

Thursday, December 12, 2019

America Christmas Card

 Hello, glad you could stop by. I know this is a hectic time of year. I can't get over that there is only 13 days until Christmas. 

Just got home  from helping my sister decorate the Church for our Christmas dinner on Sunday. It looks so pretty. My grand daughter helped also. Helps so much to have young one's around to help out. A couple of others helped out as well. 

Planning on going to the big Christmas flea market tomorrow in Louisville Kentucky with some of my family. I have things I need to be doing to get ready to head out early, so I need to get this post done.

So I want to share a card that I made for my son. He had ask me if I could make him a Christmas card to give to one of his friends and that he also needed it to be patriotic. A Christmas card that also looks American. It took me awhile to think of something I could make.  So this is what I came up with.


 Sure hope he likes It. I think it looks like an American Christmas Card. 

That's all from me, It's late and I need to get some things done so I can head off to bed.
 Thanks for stopping by. I will be sharing several more post before Christmas. Hope you can come back. Hope you have a great weekend!


 Cardz TV.
Anything Goes #104 

Always Fun Challenges - Snowflakes #140

Make My Monday challenge blog - #111 Anything Christmas

The Sisterhood of Crafters - Anything Christmas


Monday, December 2, 2019

Painted Harvest in Blue

 Hello and welcome to my blog. It's cold here in Indiana. It's still officially fall, but sure doesn't feel like it. 

I have been decorating for Christmas and have the Christmas Tree up. I do have some of my shopping done but still have several things to get.

 I must say I do love ordering on line. I did get to Walmart and got a few things for their black Friday sale. My grand kids and I enjoyed the hot chocolate and cookies they served.

Wanted to share with you a card that I made for someone that will be having surgery soon.


It was so fun playing with this stamp set again. It's called Painted Harvest and is from Stampin Up. 

I had been wanting to make one in blue. I used Marina Mist and Night of Navy. For the center I used Crushed Curry. The leaves are In Old Olive.

Was a little afraid that the blues together were to dark. Still not sure. Used the background stamp Woodgrain from Stampin Up in Going Gray.

Wasn't for sure what to put near the bottom. Found this little metal die in my dies and think that it looks good in crushed curry cardstock. I also used a stitched banner die and small piece of ribbon.

I think this card turned out pretty and I'm sure she will enjoy receiving it.


 As some of you know I post recipes on here from time to time. I thought I would share a quick tip for you bakers if you don't already know it.
If you need buttermilk for a recipe and realize you don't have any, you can substitute by using milk and lemon juice.


1 cup milk
1 1/2 tbsp. lemon juice
continue to stir while adding the juice. 
it will start to thicken up some like buttermilk

Just thought I would share that little tip with you.


Thanks for stopping by. Hope you come back. Happy day to you and God bless! 


 Card Challenges entered-

Cardz TV. - #103 Anything Goes
Through the Craft Room Door - Anything Goes
DL.ART - December Linky Party
Alphabet Challenge -R is for ribbon
Addicted-to-Stamps - Anything Goes- Stamping
Crafty Cardmakers - No patterned paper


Friday, November 22, 2019

Owl Hoot Card and more

Good afternoon, It's a cold and kind of gloomy day here In Indiana today. Wanted to get this post up before the grandkids get off the bus. They will be spending the night with us. They usually end up spending most weekends with us. I love to get to spend extra time with them. They will be all grown up before I know it.

I just love Owls and love this sweet little owl stamp. The stamp is from Unity Stamps called Have a hoot of a day. 

I made this card for a niece of mine and since Amber loves owls to I knew that this cute stamp would be perfect.


 Everything seemed to come together so quickly for this card. Love the cute patterned papers I choose for the owl. I'm not the best at paper pieces but this was pretty easy.

Added some stickles to the hat. I mean it's a birthday hat. You have to have some glitter and sparkle for goodness sake. Hee! Hee!

Don't know where I got that little piece of wood  paper but I knew it would look so cute for the sentiment. Also added a little sequins by the sentiment. 

This card was so fun to create. I just love making my own cards. Now I know that I could save a lot of money just picking up a card at the dollar store but seriously what's the fun in that? 


Also on my last post I shared some cut outs with you that I had made for my great - great nephews birthday party. Thought I would share just a few pictures of them up at the party. My niece seemed to be happy with them.


I also want to share with you a few pictures of the goodies that I won over on Crafting and Relaxings  youtube channel. 


It's a Pocket letter that is filled with Christmas crafty goodies and she also sent a few other extra goodies.


 Sorry for the poor picture quality, I tried the camera on my husbands phone. 

She does an amazing job at putting these pockets together. This was the first one that she made. My grand daughter Scarlett has been wanting to make some pocket letters. Sarah even sent a few extra pockets for her.

So we will be enjoying some crafty time together. Hope you get a chance to check out Sarah's channel. 

Well that's my share for today. Hope you enjoyed stopping by. Would love for you to leave a comment. If you do I would love to come visit your blog and see what you have been creating. 

Happy day to you crafty friends, blessings to you all.


 Challenge entered-

Cardz TV.  Anything Goes #103

Love to Craft - November- Anything Goes #40

Country View - November- Hand Stamped

Crafty Hazelnut - November- Patterned Paper

Through theCraft Room Door - November- Anything Goes

Alphabet Challenge - R is for Ribbon

Saturday, November 16, 2019

Mickey Mouse Card

 Hello, Thanks for stopping by. Wanted to share with you a card that I made for my great-great nephew Easton for his first birthday. 

He is having a Mickey Mouse party. So I used my Cricut Explore to make his card.

Cut some images from the Mickey and Friends Cartridge. So many cute images on there.


This card did come together pretty quick. I did run the star through the cuttlebug because I thought the card needed a little texture.Used the dots embossing folder.

My niece Amanda, Easton's grandma ask me if I could make a little banner to put on his highchair and if I could cut out some small Mickey heads. 

Here is a picture of the pieces I cut out for the banner. But not put together and also the different sizes of Mickey heads. I may need to cut out more.


I also made a few more things that she didn't ask for. I'm sure they will appreciate a few more things to add to the party.


I think the little Mickey shorts are cute at the bottom of the sign in sheet. Easton Is going to be wearing a pair of them with suspenders for his party. 

I did cut out a big Mickey Mouse head but forgot to take a picture of it. I will try to get a few pictures at the party. 

That's all I have today to share. Hope you all have a great day and hope you come back again.    


 Challenge Entered-

Cardz TV. -#102 Anything Goes

Creative Crafters - #22 Anything Goes

Craft Rocket Challenges  - #65 Happy Birthday

Monday, November 4, 2019

Have yourself a Merry little Coffee

 Hello Crafter's, glad you could stop by. Want to share a card with you that I have made for the Fall/Winter 2019 Coffee Lover's Blog Hop Challenge. 
It is from Friday November 1st - Friday November 8th.

 Oh my, the hop has been so fun and have gotten so much Inspiration. 

I don't have a lot of coffee stamps (yet) so I made this using a digital Image I downloaded from one of the sponsors of the hop.

This was my first time using a digital Image. So, I was a little nervous. But it was easy to download. The hardest part was cutting it out. I think it turned out pretty cute. 


This was my first time using a digital Image. So, I was a little nervous. But it was easy to download. The hardest part was cutting it out. I think it turned out pretty cute. 

Here is a list of supplies that I used,

Digital Coffee Image from Jessicalynn originals
Stampin Up Stamp Set- Snowflakes
Card stock- White, Kraft and Real Red
Paper- from the Night before Christmas 6X6 Designer Series Stampin Up
Inks- Always Artichoke,Old Olive,Real Red,Summer Sun,Ruby Red and Blackberry Bliss
Stitched circle die
Martha Stewart snowflake punch
White pom pom trim
Rhinestone gem


If you get a chance hop on over to the start of the hop at Coffee Loving Cardmakers. 
There are lots of great sponsors and lots of Awesome prizes. 

That's it for me today. Hope you all have good and blessed day.


Sunday, November 3, 2019

Let It Ride Birthday Card and White Milk Gravy

 Hey Crafter's, Glad you could stop by today to see my latest card that I have made.

My Daughter's birthday is today. Won't say how old she is. She may not want me saying. I will say she's over 21. Hee! Hee!

My daughter LOVES horses. So I knew for this year I wanted to make her a card with a horse on it. As soon as I seen the stamp set "Let It Ride" I knew I had to get it. 

So here Is the card I made for her.


 I have to say I enjoyed putting this card together. I had bought that embossed brown paper years ago. So glad I finally used it. It's called Brown pressed Tiles from the Paper Studio.

I was at the Dollar Tree one day and seen the roll of Burlap ribbon. I knew that it would be perfect for this card. 

Did a little water coloring for the sky and grass using Marina Mist, Old Olive and Mellow Moss. Stamped the horse in Timber Brown and colored it with a Stampin Blendabilities in the color Nude. 
Framed the picture with a scalloped rectangle die in Old Olive.

 Used the weathered background stamp in chocolate chip on the marina mist cardstock. Thought that made it look a little more rustic. The base of the card is Close to Cocoa.

Almost didn't add the sentiment to the front of the card because I wasn't for sure it would look right but I managed to get it on there. I think it looks o.k. I also made the rope using some jute twine.

I'm pretty sure she Is going to love this one. It will remind her of her horse Dolly. 


I also thought I would share a recipe with you. My grandkids spent the night a few nights ago. So I decided to make a breakfast supper. Made some white gravy and thought I would share with you. 


White Milk Gravy

You will need-

4 Cups Milk
8 Tbs. Flour
1 Stick butter
Pepper
Salt

In a skillet add 1 stick butter. Melt, to that add 8 Tbs. flour. Mix and add 2 cups milk. Add pepper and just a little salt and vigorously whisk to get the lumps out and then add 2 more cups milk. When it starts to bubble keep stirring until it's thicker.  Don't leave it, it will stick to bottom. Take off heat. It will thicken up more after it's taken off.

 That's it, wasn't that simple? If you need more just double recipe. I sometimes double it so that we can have it for the next day. 


Hope you enjoyed stopping by and seeing my card and If you try the recipe let me know how it turns out.  Have a great day crafty friends. God Bless!!!


 Challenges entered-

Through the Craft Room Door - Anything Goes

Cardz TV. - #101 Anything Goes

Love to Scrap  - #127 Anything Goes

Country View Challenges - November- Hand Stamped

Crafty Creations - #401 Anything Goes

The Paper Players - Into the woods


Thursday, October 31, 2019

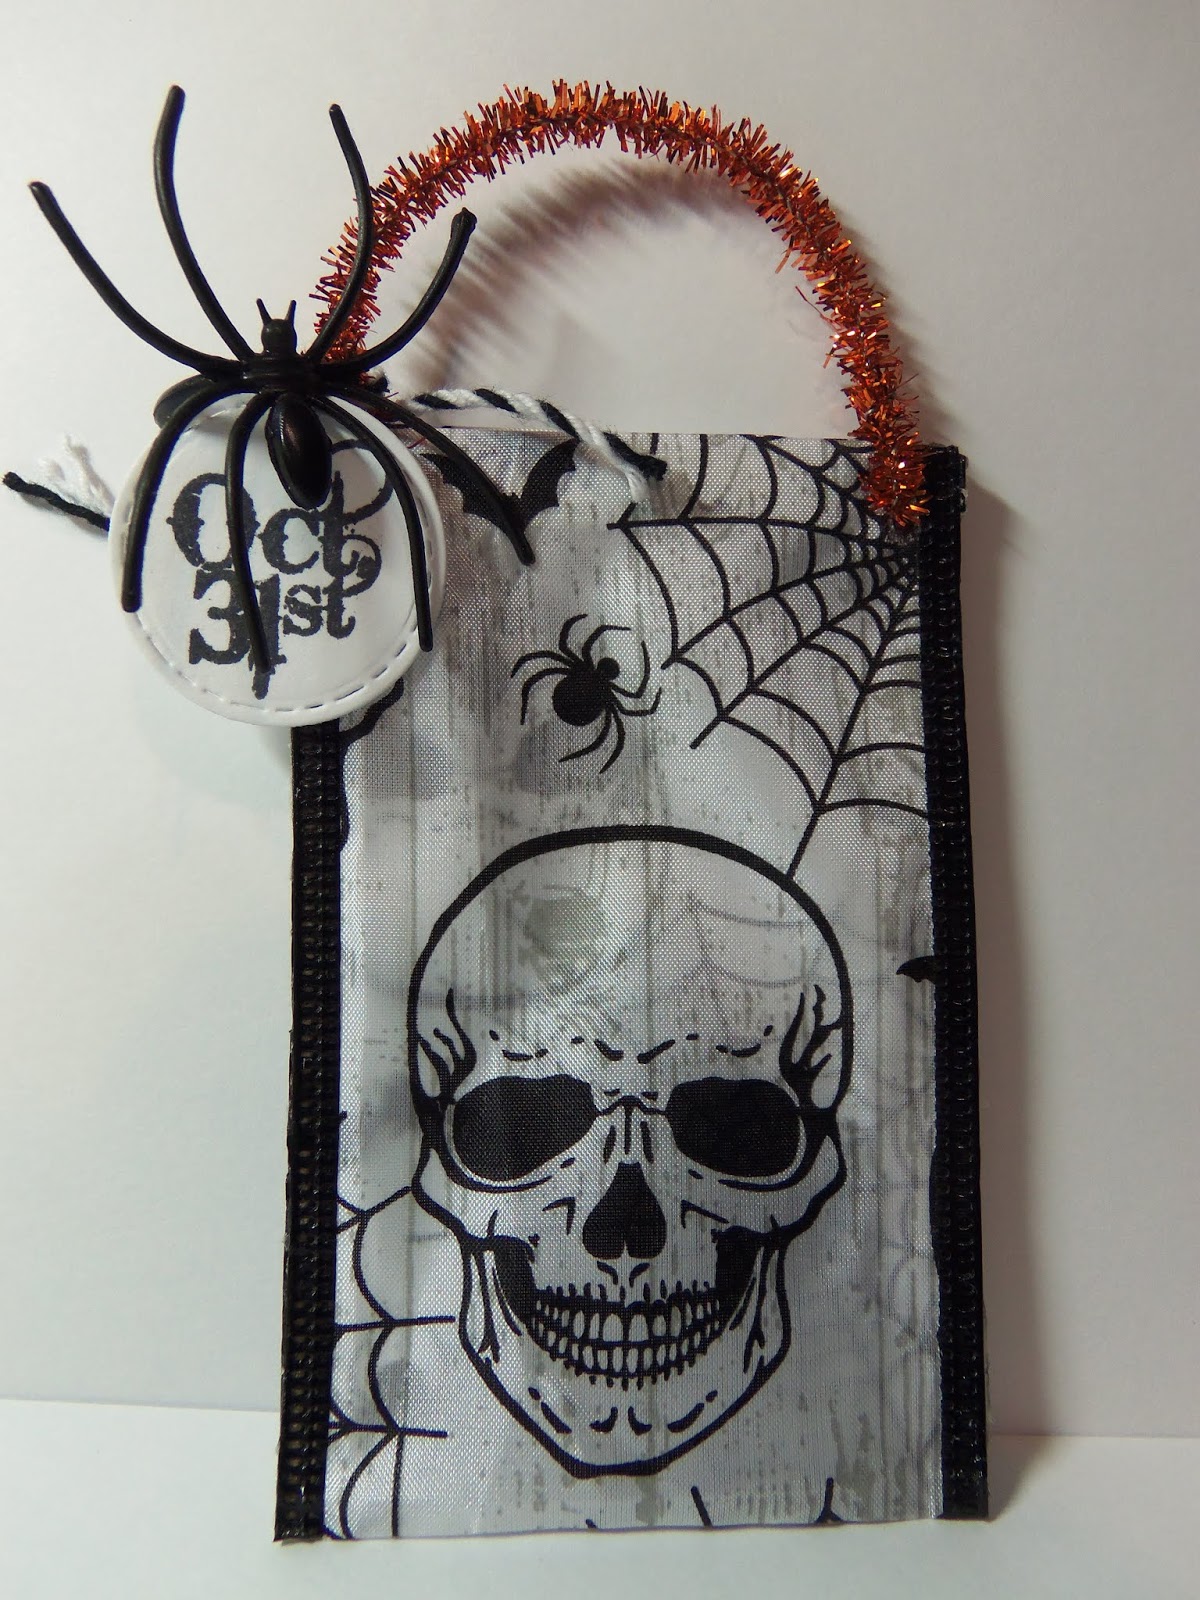
Halloween Ribbon Treat Bags

 Happy Halloween to you, glad you could stop by. On my last post I shared with you some cute cat treat boxes that I made for my grand kids. Today I want to share with you a few treat bags that I have made out of ribbon.

I had seen a video on youtube of someone making these and had to give them a try. I did make mine a tiny bit longer. I think I added an extra inch.


 The ribbons, pipe cleaners and the bat and spider rings were all bought from the Dollar Tree. So these were pretty cheap to make.

Used my glue gun to glue the sides together. Used my crop a dile to punch holes for the pipe cleaners. Also used a circle stitched die, halloween stamps and some bakers twine.

Thought they turned out cute. Well I need to go. Going to go make my treat cups for trick or treaters. 

 Hope you have a spooky fun Halloween.

 Challenge Entered

Love to Craft-#39 October Anything Goes

Shopping our Stash - #407 Halloween

Crafty Creations Challenges - #401 Anything Goes